Reverb is becoming an increasingly important part of game audio and I wanted to help design a system where it could be used to it’s fullest capacity without drawing upon an excessive amount of engine resources.
My audio colleagues and I collaborated with our audio programmer to create such a system. The intended result was this: in any space of any level, all of the audio sources that originate from within those spaces should sound acoustically appropriate with regard to reverb. So if the player is standing inside the bathroom of a house reloading a weapon and there is another character outside of the house screaming frantically in an open field, both should have unique reverb settings applied to them – indoor and outdoor, respectively – again, without weighing down the engine.
Getting the reverb to sound appropriate was the easy part, especially since we often used Wwise which allows for real-time adjustments during testing. I spent a lot of time on projects creating unique profiles – stairwells, canyons, parking garages, rural homes, etc – and meticulously tweaking the settings to find a sweet spot that would allow any audio source to sound good when passed through the profile, whether it be dialog, gunfire, footsteps or whatever.
The slightly more difficult problem was finding a way to populate levels with several reverb boxes, all of which were processing audio sources within them while not slowing the engine to a crawl. The solution to that is a bit long to go into here, but the short version is that we came up with a way for code to “look at” the sound radii of all audio-emitting actors, their relative proximity to the player’s listening radius and then determine whether or not the resulting overlap (if any) warranted reverb processing; sort of like a venn diagram. Put more simply: unless the player could absolutely hear the audio emitted by an actor, the reverb box it was inside of didn’t process anything.
The thumbnails below are high-res screen shots of the reverb system we developed (make sure to expand them to full size):
-
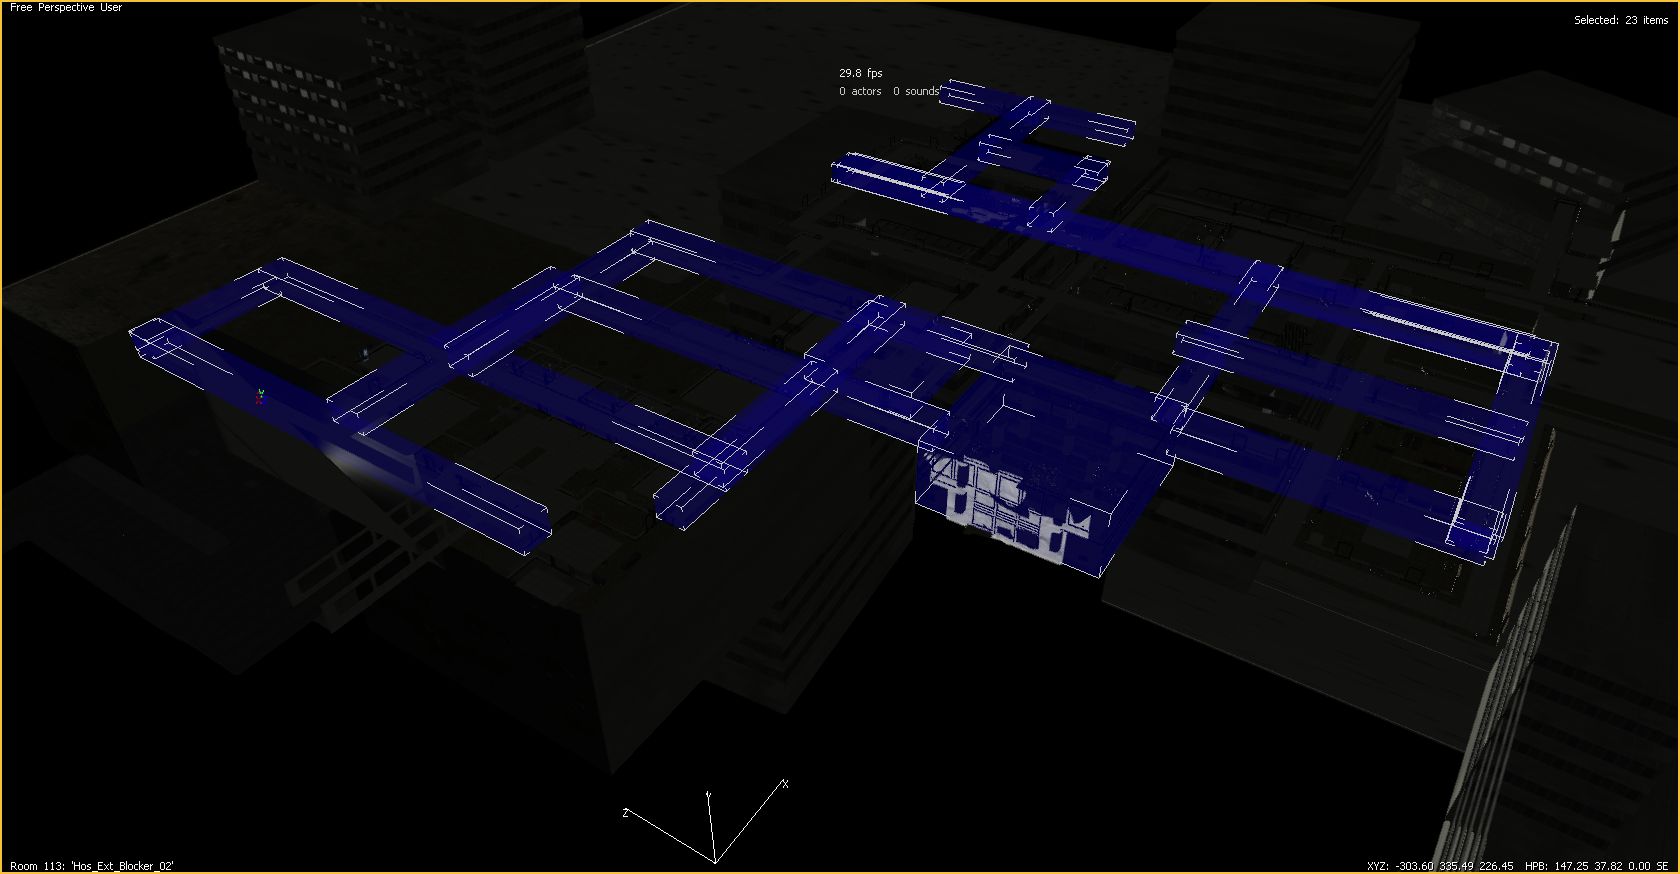
- overhead view of reverb actors
-

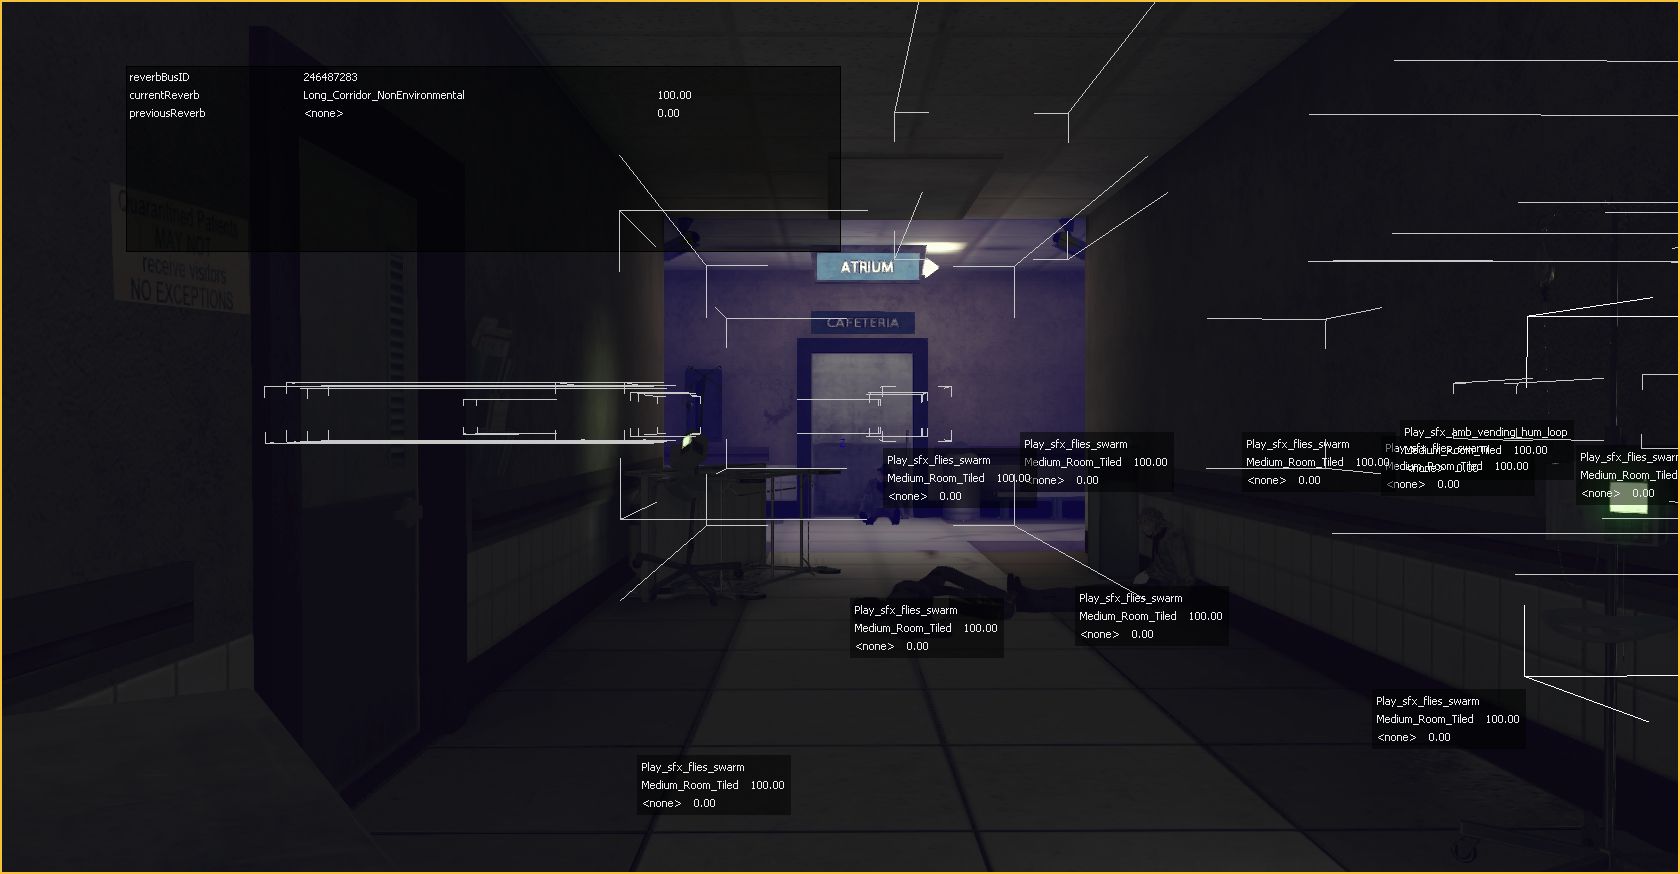
- reverb debug info
-
- reverb actors displayed
The first image is a bird’s-eye of one of our game maps (an abandoned hospital) with only the reverb actors visible. They’re highlighted in blue with white lines around the corners. This allows you to get a broad view of actor placement in levels – which is especially useful in maps such as this one where many hallways and rooms are close together.
The second image displays the reverb debug information in the large grey box located in the upper left-hand corner (all the other boxes can be ignored). It lists the bus ID Wwise uses for the reverb, the name of the current reverb profile the player is inside of (Long_Corridor), the previous profile the player was in (none) and values for a crossfade system still under development (100.00 and 0.00).
The last image shows how reverb actors appear while in player perspective. It allows one to move throughout the level and see the placement of surrounding actors – in this case, a hallway in front of them. When any audio-emitting actor enters it, it’s audio will be processed through the Wwise reverb profile which it references.
Finally, here is a video first demonstrating how the system looked while working in the editor followed by six different examples of reverb profiles I created and implemented with this system. It’s in HD, so feel free to set it to 720p or 1080p.
1 – Hospital hallway shotgun blast and reload
2 – Outdoor gunfire with reverb delays
3 – Indoor parking garage reverb (no walkers)
4 – Indoor parking garage reverb (with walkers)
5 – Indoor stairwell reverb
6 – Outdoor vs indoor reverb – including walk-in freezer

